
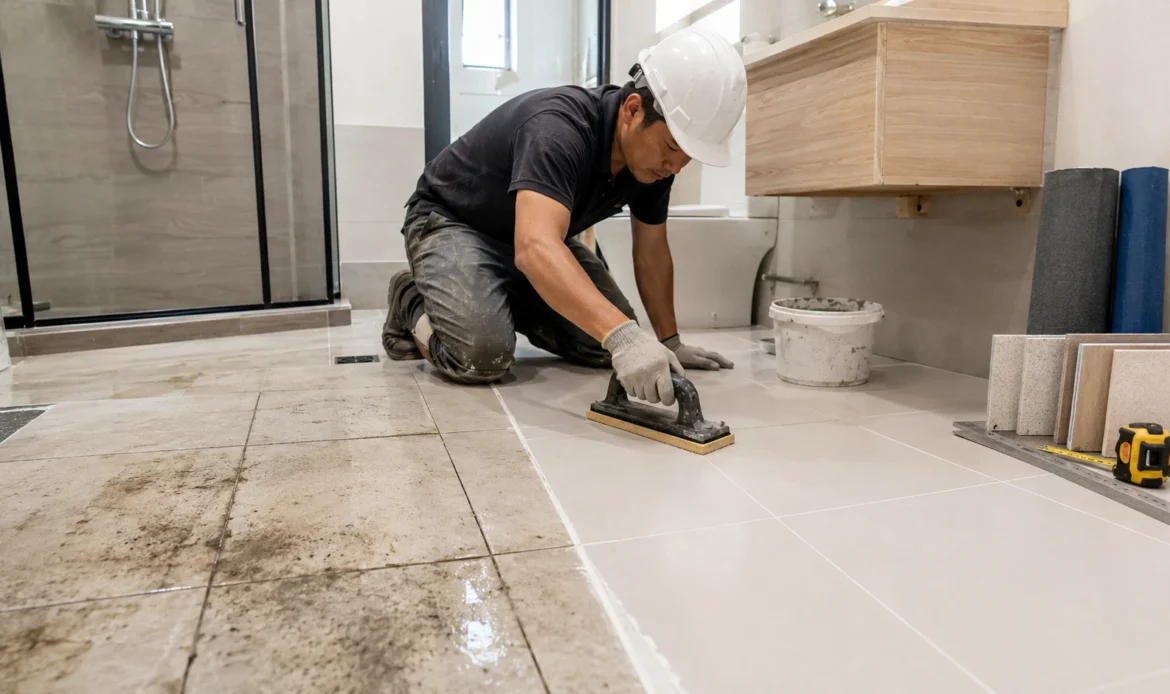
Most homeowners pour hours into choosing tiles. They weigh porcelain against homogeneous slabs, debate matte versus polished, and budget carefully for the right shade of marble. Then they leave the grout entirely up to the contractor.
That single oversight often decides how long the whole floor lasts. The grout joint is the narrowest, cheapest part of any tiled surface, yet it does the heavy lifting: keeping water out, resisting stains, and absorbing the structural stress of a building that never quite stops moving. In Singapore, getting it wrong is costly in ways that stay hidden for years.
We live with relative humidity that sits between 70 and 85 percent for most of the year, ambient humidity averaging around 84 percent, and monsoon months that can deliver more than 300 mm of rain. Those conditions do not just feel sticky. They speed up the breakdown of building materials in ways that temperate-climate advice never accounts for. Damp tile gaps become nurseries for black mould, and the daily swing between fierce sun and sudden downpours puts rigid jointing compounds under constant thermal strain.
This guide settles the epoxy grout vs. cement grout question for Singapore homes specifically. We will work through the chemistry, the tested performance figures, the HDB and BCA rules that decide what you are actually allowed to do, the real lifecycle costs, and a clear room-by-room verdict. The honest answer up front: there is no single winner. The right choice depends on the room, and by the end you will be able to make that call yourself instead of defaulting to whatever the installer prefers.
Quick Verdict: Epoxy or Cement Grout?
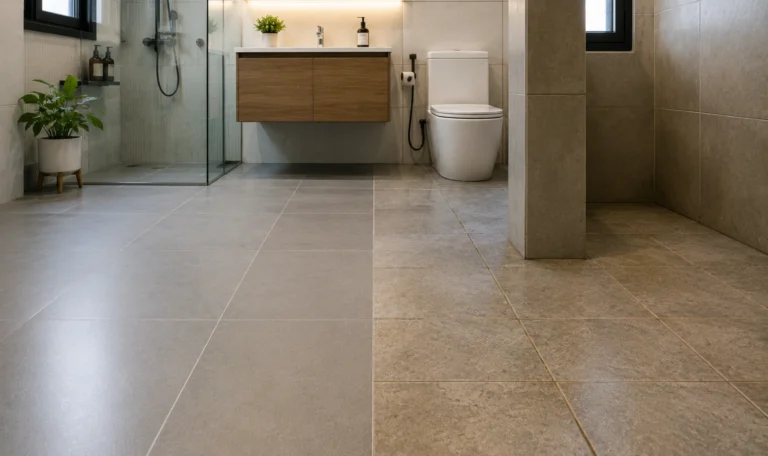
If you only have thirty seconds, here it is. Use epoxy grout in every wet and chemically exposed zone: bathrooms, showers, kitchen floors, and backsplashes. Use a quality polymer-modified cement grout (Class CG2WA) in dry living areas where budget matters and moisture is minimal. For sun-baked open balconies, skip both and choose a UV-stable polyurethane grout.
The whole comparison comes down to one trade-off. Cement grout is cheap to install and expensive to live with. Epoxy grout costs more on day one and almost nothing afterward.
Factor | Cement Grout (CG2WA) | Epoxy Grout (RG) |
Water resistance | Porous, absorbs moisture | Non-porous, effectively waterproof |
Lifespan in wet areas | 2 to 5 years | 10 to 20+ years |
Maintenance | Reseal every 6 to 12 months | None |
Upfront cost | S$2.50 to S$4.00 per sq ft | S$7.00 to S$15.00 per sq ft |
Best use | Dry living areas | Bathrooms, kitchens, wet zones |
The one-line rule: Match the grout to the room, not to a slogan. The cheapest option on installation day is rarely the cheapest option across twenty years.
The Chemistry and Classification of Grouting Materials
The performance gap between these two materials is not marketing spin. It comes straight from how each one is built at a molecular level, and once you see that, every later decision becomes obvious.
Cement grout and epoxy grout cure through completely different chemical reactions. One leaves microscopic holes throughout the material; the other forms a solid, sealed block. That structural difference is the whole story behind why one stains, cracks, and grows mould while the other shrugs off water for decades.
Under the European standard EN 13888, which Singapore suppliers print on their datasheets, grouts fall into two families: cementitious grouts (labelled CG) and reaction resin grouts (labelled RG). The two classes you will actually meet in local HDB and condominium specifications are CG2WA for upgraded cement grout and RG for epoxy.
Cementitious Grout Explained (CG1, CG2, CG2WA)
Traditional cement grout blends Portland cement, fine sand, pigments, and water. Modern versions add polymers to improve flexibility and reduce water uptake, which earns the CG2 classification, and a further “WA” suffix marks a water-repellent additive. These are real improvements, and a quality CG2WA grout is a sensible choice for the right room.
The limitation is baked into the chemistry. Cement cures through hydration, a reaction that inevitably leaves behind a network of interconnected microscopic capillary pores. Those pores behave like a sponge. Water, soap scum, shampoo residue, and body oils wick into the joint during everyday use and settle there.
Key takeaway: Even the best polymer-modified cement grout resists water. It does not exclude it. The “WA” additive slows absorption; it does not stop it.
Epoxy Grout Explained (Reaction Resin / RG)
Epoxy grout works on a different principle entirely. It is a two-part system: an epoxy resin base, a chemical hardener, and fine silica filler. The moment you combine the resin and hardener, a thermosetting reaction called cross-linking polymerisation begins, lacing the polymer chains into a dense three-dimensional grid.
Once cured, that grid is non-porous and water-impermeable. There are no capillary channels for moisture to travel through, which is why epoxy grout never needs a sealer to do its job. It also resists the acids, alkalis, and staining agents that slowly chew through cement.
A fair question is whether epoxy grout is completely waterproof. In practice, high-quality epoxy grouts show near-zero capillary absorption, so for any real household purpose, yes. The waterproofing is structural and permanent, not a surface coating that wears off with cleaning
Key takeaway: Epoxy’s water resistance is part of the material itself, so it does not degrade with scrubbing or age the way a sealer does.
These advantages are not just manufacturer claims. Research published in Construction and Building Materials on epoxy resin-modified cement grouts found significantly higher compressive and tensile strength, plus superior adhesion and chemical resistance, compared with standard cement grout. Separate studies on super-low-viscosity epoxy formulations showed improved toughness and the ability to penetrate and seal micro-fissures, which is exactly the property you want when filling joints in a building that flexes every day. The same family of materials underpins quality cement screed and flooring preparation, where a sound substrate is what lets any grout perform.
Grout Brands and Classes Available in Singapore
Knowing the class is useful, but you will be naming products to a contractor. Here is how the common lines map to their EN classification and best-fit environment.
Product Line | EN 13888 Class | Formulation | Best-Fit Local Use |
Mapei Keracolor SF | CG2 | Super-fine cementitious mortar, joints up to 4 mm | Interior wall tiling, mosaic and marble detailing |
Mapei Ultracolor Plus | CG2WA | Rapid-set, polymer-modified, water-repellent | Dry living areas, dry kitchens, low-moisture floors |
Saint-Gobain E.Mix | CG2WA | Eco-formulated with recycled content | HDB dry interiors, public projects |
Mapei Kerapoxy | RG | Two-part, acid-resistant epoxy | Wet HDB bathrooms, commercial kitchens, pools |
Laticrete SpectraLOCK | RG | High-uniformity epoxy, strong chemical resistance | High-traffic commercial floors, clean rooms |
Ardex WA | RG | Premium chemical-resistant epoxy, easy washability | Luxury residential, wet spas, lab floors |
Performance, Tested: What EN 13888 and EN 12808 Actually Prove
Manufacturers can describe their products however they like, but grouts are tested against the EN 12808 series, which subjects samples to controlled mechanical and environmental stress. Translating those lab results into everyday consequences is where the comparison becomes persuasive.
Here is the centrepiece data, with each property tied to what it means in your home.
Property | Cement Grout (CG2) | Epoxy Grout (RG) | Test Standard |
Capillary water absorption | Up to 2 g (30 min); up to 5 g (240 min) | Under 0.5 g (240 min) | EN 12808-5 |
Abrasion resistance (volume loss) | Up to 1,000 mm³ | Up to 250 mm³ | EN 12808-2 |
Flexural strength (dry) | At least 3.5 N/mm² | At least 30 N/mm² | EN 12808-3 |
Service life (wet areas) | 2 to 5 years | 10 to 20+ years | N/A |
Water absorption (EN 12808-5) measures how much moisture a grout draws in through capillary action. A CG2 cement grout is allowed to absorb up to 5 g over four hours of exposure; an RG epoxy grout must stay under 0.5 g. In Singapore’s constant humidity, where joints meet moisture far more often than in a dry climate, that tenfold difference is the single most important number on the page. It is the direct cause of mould, staining, and the slow saturation of the floor bed beneath the tiles.
Abrasion resistance (EN 12808-2) tracks how much material wears away under a rotating abrasive wheel, simulating foot traffic, dragged furniture, and repeated scrubbing. Cement grout can lose up to 1,000 mm³; epoxy is capped at 250 mm³. That fourfold gap is why epoxy is the default in shopping malls, MRT stations, and commercial kitchens.
Flexural strength (EN 12808-3) measures resistance to bending without cracking, which matters enormously in a high-rise. Cement grout needs to reach only 3.5 N/mm²; epoxy must hit 30 N/mm².
Why a tenfold flexural gap matters here: Singapore’s concrete high-rises micro-move every single day through settlement, thermal expansion, and shifting load. Rigid cement grout passes those stresses straight into hairline cracks. Epoxy flexes and holds.
Singapore's Tiling and Waterproofing Rules (HDB and BCA)
This is the part most online guides get wrong, and the part that actually limits your options. Tiling work in Singapore is governed by the Building and Construction Authority’s construction-quality framework and by HDB renovation rules. Knowing them protects you from contractors still working to outdated codes. If you want the homeowner-level summary first, our guide to HDB floor tiling rules every homeowner should know covers the essentials.
Rule | Standard | The Limit | Why It Exists |
Tiling code of practice | SS 665:2020 | Replaces CP 68:1997 | Modern surface prep, adhesive, joint standards |
Lippage tolerance | CONQUAS / QM | 0.5 mm maximum | Flat, safe, well-finished joints |
Floor finish thickness | HDB | 50 mm total maximum | Prevents slab overloading |
BTO hacking | HDB | Restricted 3 years | Protects original waterproofing |
Membrane upturn | SS 637:2018 | 150 mm (1,800 mm in showers) | Stops water bypassing the seal |
SS 665:2020: The Code That Replaced CP 68:1997
In 2021, the Singapore Standards Council retired the long-serving Code of Practice CP 68:1997 and replaced it with Singapore Standard SS 665:2020, the Code of Practice for ceramic wall and floor tiling. SS 665 brings local practice in line with international benchmarks (principles drawn from BS 5385) and sets detailed requirements for substrate preparation, adhesive selection, expansion joints, and grouting, all aimed at preventing common defects such as hollow-sounding or popped tiles.
This matters because most competing articles still quote CP 68. If a contractor references the old code, that tells you something about how current their methods are.
Pro tip: Ask your contractor whether their work follows SS 665:2020. The answer is a quick test of how up to date they are.
CONQUAS and the 0.5 mm Lippage Standard
Under the Construction Quality Assessment System (CONQUAS) and the Quality Mark scheme, workmanship is graded on strict measures. The headline one is lippage, the vertical step between adjacent tile edges, which is capped at 0.5 mm. Grout lines must also be uniform, fully filled, and free of pinholes and voids.
Hitting 0.5 mm requires a genuinely level subfloor and disciplined installation. This is also where grout integrity is won or lost: an uneven bed flexes, and flexing cracks the joints regardless of which grout you chose.
HDB Structural Limits: The 50 mm Screed Rule
To avoid overloading the reinforced concrete slabs in high-rise blocks, HDB caps the combined thickness of new floor finishes and the underlying cementitious screed at 50 mm. That constraint forces careful coordination between the screed, the adhesive bed, and the tile thickness, and it directly affects whether an overlay renovation is even feasible.
The 3-Year BTO Hacking Restriction and the Overlay Method
For new Build-To-Order flats, HDB enforces a 3-year restriction on hacking bathroom floor and wall finishes. The reason is structural protection: the original developer-laid waterproofing membrane and pre-packed screed carry a 5-year warranty, and any hacking or demolition work risks puncturing it.
If you want to renovate a BTO bathroom inside that window, you must use the tile-on-tile overlay method, bonding new tiles directly over the existing ones with high-performance adhesive. The total added thickness of new tile plus adhesive cannot exceed 13 mm, and the original floor trap must stay untouched.
Warning: Within the first 3 years, you cannot hack a BTO bathroom floor to regrout it. You overlay, then grout the new joints. Epoxy is fully allowed on the new tiles; hacking is not.
Wet-Area Waterproofing Under SS 637:2018
Grout never works alone. Beneath it sits a waterproofing system governed by SS 637:2018, the Code of Practice for waterproofing of reinforced concrete buildings (which replaced CP 82:1999). It requires a liquid-applied membrane over a pre-packed screed before any tiling begins.
That membrane must turn up the walls and pipe penetrations by at least 150 mm, rising to 1,800 mm in shower stalls. Once cured, it must pass a water ponding test: floor traps plugged, the area flooded to 25 mm depth, and held for a minimum of four hours (often 24 to 48 hours for thorough verification) to confirm no leaks reach the unit below. Only after it passes can tiling and grouting proceed. You can confirm the current procedure on the official HDB renovation guidelines for building works.
Key takeaway: Grout is your first line of defence, not your only one. Good epoxy grout protects the membrane below it by keeping the screed dry in the first place.
Inter-Floor Leakage: The Real Cost of the Wrong Grout
Porosity sounds abstract until it becomes a damp ceiling and a tense conversation with the neighbour upstairs. In Singapore’s stacked living, water that slips through a grout joint does not simply vanish. It has somewhere to go, and that destination is usually someone else’s home or your own bedroom.
National data puts the scale in perspective. HDB receives roughly 21 reported ceiling-leak cases per 1,000 dwelling units each year, and about 92 percent of those originate from degraded piping or failed waterproofing in the unit above. Membrane wear typically begins to show within 8 to 12 years of construction, which means a porous grout that keeps the screed permanently damp is quietly shortening that timeline.
How Water Actually Travels: Lateral Seepage Explained
Here is the failure mode almost no competitor explains, and the one that catches homeowners completely off guard.
When water penetrates porous cement grout in a bathroom, it saturates the screed bed beneath the tiles. If the waterproofing membrane has a proper 150 mm upturn against the walls, gravity may be blocked from sending that water straight down. So the water does the next available thing: it travels horizontally through the porous screed and exits at the bathroom-side skirting boards.
The result is damp patches, bubbling paint, mould, and warping in adjacent rooms, ruining built-in wardrobes and parquet flooring in a bedroom that never sees a drop of shower water.
Common misconception: “There is no stain on my neighbour’s ceiling, so I do not have a leak.” False. Lateral seepage can damage your own adjacent rooms while the unit below stays perfectly dry. A clear ceiling downstairs is not an all-clear.
Non-porous epoxy joints cut off this whole chain at the source by stopping water from entering the screed in the first place. Where a leak has already taken hold, specialist waterproofing and roof-leakage repair is the route back to a dry, sound structure.
The HDB 50/50 Rule and Goodwill Repair Assistance
Under the Housing and Development Act, the structural floor slab between two flats is jointly owned, so when an inter-floor leak is confirmed, both the upper and lower owners share responsibility for repairs and split the cost.
To ease disputes, HDB runs the Goodwill Repair Assistance (GRA) scheme. When both owners cooperate, HDB co-shares 50 percent of the slab repair cost, and the remaining half is split equally, so each owner pays 25 percent.
The catch is what GRA does not cover. It pays only for structural slab repair, not for damaged built-in cabinets, false ceilings, or lighting. Those have to be negotiated directly between neighbours, which is exactly where things turn sour. Disputes routinely stall repairs for more than three months, and HDB resorts to legal action against persistently uncooperative owners in around 30 cases a year.
Key takeaway: Preventing a leak with the right grout is far cheaper, and far less stressful, than apportioning blame after one appears.
Concrete Cancer: When a Leak Becomes Structural
Neglect a leak long enough and the damage stops being cosmetic. Water seeping through slab cracks meets oxygen and carbon dioxide and begins carbonation. If that water carries chloride ions, common in household cleaning chemicals, it penetrates the concrete and corrodes the steel reinforcement bars inside the slab.
As the rebar rusts, it expands up to six times its original volume, generating enormous internal pressure that cracks and spalls the surrounding concrete. This is spalling concrete, often called “concrete cancer”, and at an advanced stage it threatens structural safety, not just appearance.
Warning signs of spalling: flaking concrete on a ceiling, rust-coloured stains, and exposed or rusty rebar. These call for professional attention, not a fresh coat of paint.
True Cost and 20-Year ROI in the Singapore Market
The objection to epoxy is always price. And on installation day, the objection is correct: epoxy genuinely costs more. The mistake is stopping the calculation there, because the cheap option keeps charging you for the next two decades.
Upfront Installation Costs
Cement grout is the budget-friendly choice at the start. In Singapore, professional application runs roughly S$2.50 to S$4.00 per square foot.
Epoxy grouting costs considerably more, typically S$7.00 to S$15.00 per square foot, depending on tile size, layout complexity, and brand. For a single bathroom regrouting job, expect a minimum mobilisation charge from around S$500, since the labour and precision involved do not scale down neatly for small areas.
The Hidden Cost: Sealing and Maintenance Cycles
This is the line item competitors leave out. Cement grout must be sealed with a penetrating sealer after installation, and that sealer has to be reapplied every 6 to 12 months at roughly S$1.00 to S$3.00 per square foot.
Even with diligent sealing, acidic cleaners, soap, and constant moisture erode the protection over time. Miss a cycle and the joints discolour, absorb stains, and harbour mould within 12 to 36 months. Epoxy needs none of this. It is sealer-free for life and cleans with a damp cloth.
The 20-Year Lifecycle Model: The ROI Verdict
Stretch the comparison across a realistic ownership horizon and the numbers flip completely. Here is a 20-year projection for a standard 50 sq ft Singapore bathroom.
Cost Parameter (50 sq ft) | Cement (CG2WA) | Epoxy (RG) | Premium PU |
Installation (material + labour) | S$150 | S$500 | S$750 |
Initial sealing (Year 0) | S$100 | S$0 | S$0 |
Resealing over 20 years | S$1,500 | S$0 | S$0 |
Regrouting (3 cycles) | S$900 | S$0 | S$0 |
PU crack injections (2) | S$1,200 | S$0 | S$0 |
Failed waterproofing redo | S$2,500 | S$0 | S$0 |
20-year total | S$6,350 | S$500 | S$750 |
Pro tip: Spending an extra S$350 to S$600 upfront on epoxy or polyurethane eliminates close to S$5,800 of recurring maintenance, regrouting, and waterproofing-failure cost over twenty years. In any wet area, epoxy becomes the cheaper option somewhere around the three-to-four-year mark and only widens its lead after that.
Application and Workmanship: Why Epoxy Is Harder (and How Pros Handle It)
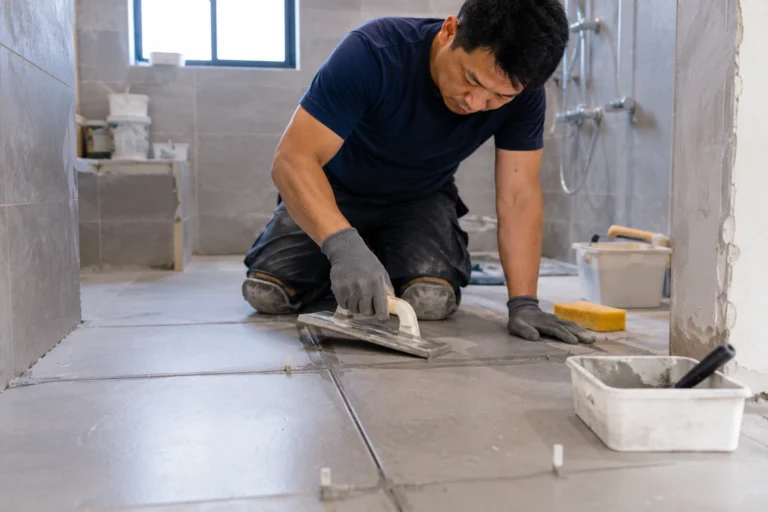
There is a legitimate reason some installers steer clients toward cement: epoxy is genuinely harder to apply, and a botched epoxy job can look worse than good cement work. Being honest about this is part of making the right decision, and it is also why skilled professional floor tiling matters more with epoxy than with any other grout.
Here is the professional protocol, step by step:
- Substrate inspection. Confirm tiles are fully set and joints are dry and clear.
- Precision mixing. Combine resin and hardener at the exact factory ratio.
- Segmented troweling. Work in small sections to beat the short pot life.
- Wet emulsification. Mist with water to lift excess resin before it bonds to the tile face.
- Complete clean-up. Wipe the tile surface thoroughly to prevent haze.
- Controlled cure. Keep the area dry and dust-free for 24 to 48 hours.
The Pot-Life Problem
Cement grout is forgiving. You can mix a large batch, take your time, and wipe off dried residue later. Epoxy is the opposite. Once resin and hardener meet, the clock starts on a 30 to 45 minute pot life, shorter in warm conditions.
Miss that window and the material hardens inside the joint and on the tile, where removal becomes a nightmare. The mix ratio also has to be exact; get it wrong and the grout cures tacky, soft, or crack-prone.
Key takeaway: Epoxy punishes hesitation. Experience and speed are not optional extras here; they are the difference between a clean finish and a ruined one.
Epoxy Haze: The Costly Cleanup Mistake
Any resin film left on the tile during cleanup dries into epoxy haze, a stubborn, semi-translucent, plastic-like layer with a glossy sheen. On matte, textured, or natural-stone tiles, it wrecks the look. Removing fully cured haze takes aggressive chemical strippers that can themselves damage sensitive surfaces.
Warning: Porous and unglazed tiles, including most natural stone, should be pre-sealed before epoxy grouting so haze cannot bond into the surface. Skip this step and a small mistake becomes permanent.
Substrate Prep and Mechanical Leveling
Durable results start below the tile. Professionals check the screed’s moisture content with an electronic meter, because residual moisture can undermine adhesive performance or cause bubbling under cured epoxy. Adhesive coverage is held to a minimum of 95 percent in dry areas and a full 100 percent bed in wet zones, which eliminates the hollow voids that let tiles crack under load.
To hit the 0.5 mm CONQUAS lippage limit, installers match trowel notch and leveling-clip density to tile size:
Tile Size | Trowel Notch | Leveling Clips |
300 x 300 mm | 6 mm | N/A |
600 x 600 mm | 10 mm | Min. 4 per tile |
800 x 800 mm | 12 mm | Min. 6 per tile |
1200 x 600 mm | 12 mm | Min. 8 per tile |
Clips sit 50 mm from each corner, locking the whole floor into one flat plane before grouting begins.
Should You DIY Epoxy Grout?
It is possible, but for most homeowners it is not worth it. The short pot life, exact mixing, and haze risk mean a first-timer’s mistakes are often permanent and expensive to undo, frequently costing more than hiring a professional would have in the first place. For a small, low-stakes dry area, a careful DIYer can manage cement grout. For epoxy in a bathroom, bring in an experienced tiler.
Room-by-Room: Which Grout Goes Where
All the theory comes together here. The right material depends on what each room actually has to survive, and this is also where the honest alternatives to epoxy earn their place.
Zone | Moisture | Main Threats | Recommended | Alternative |
Bathrooms & showers | Extreme | Mould, body oils, soap scum | Epoxy (RG) | Polyurethane |
Kitchens & backsplashes | Moderate | Grease, oil, acidic spills | Epoxy (RG) | High-grade polymer cement |
Balconies & terraces | Extreme | UV, thermal expansion | Polyurethane / polyaspartic | UV-stabilised epoxy |
Living rooms & bedrooms | Low | Scuffs, dust | Cement (CG2WA) | Marble gum (dry only) |
Bathrooms, Showers, and Wet Rooms: Epoxy
Constant water, humid air, body oils, and soap make this the worst possible environment for porous cement, which here reliably leads to mould, absorption, and eventual waterproofing failure. A 100 percent waterproof, chemical-resistant epoxy grout is the clear choice for bathroom floors and shower walls.
Pair it with HDB’s recommended UPVC floor-trap grating with a long collar, glued directly to the discharge pipe. That collar seals the raw screed from water bypass, and together with an epoxy barrier it protects the slab from two directions.
Kitchens and Backsplashes: Epoxy
Kitchen surfaces face grease, cooking oil, and acidic spills from vinegar, citrus, and tomato. Cement grout drinks all of it in, leading to permanent stains, lingering odours, and bacterial growth. Epoxy grout is stain-resistant, non-porous, and acid-proof, so a damp cloth keeps it clean.
Balconies and Outdoor Areas: Polyurethane or Polyaspartic
This is where blanket “epoxy is best” advice goes wrong. Open balconies take intense UV and heavy downpours, and standard epoxy resins yellow and chalk under prolonged sun exposure. Cement, meanwhile, cracks under the thermal expansion of the sun-then-rain cycle.
Common misconception: Epoxy is not the right answer everywhere. For sun-exposed balconies, a UV-stable polyurethane or polyaspartic grout combines flexibility, waterproofing, and weather resistance far better.
Living Rooms, Bedrooms, and Dry Corridors: Cement (or Marble Gum)
Dry zones see light foot traffic and minimal moisture, so a quality polymer-modified cement grout (CG2WA) is cost-effective and entirely adequate. This is the room where cement legitimately wins on value.
For a seamless, high-gloss look on homogeneous or natural marble floors, marble gum is a popular alternative. A liquid polyester compound is poured into the joints, then ground and polished flush so the joint lines disappear.
Warning: Marble gum turns slippery when wet and needs repolishing every 3 to 5 years, so keep it strictly to dry areas. Never use it in a bathroom.
Green Certification and Indoor Air Quality
As Singapore drives toward its “80-80-80 by 2030” green building targets, materials are increasingly judged on sustainability and health, not just performance. Grout is part of that picture.
SGBP Certification and BCA Green Mark Points
The Singapore Green Building Council runs the Singapore Green Building Product (SGBP) certification scheme, which assesses materials on environmental performance, carbon footprint, and health impact including VOC emissions. Products earn a rating from 1 to 4 “ticks” (Good to Leader), and using higher-rated products accrues points toward a project’s overall BCA Green Mark score. You can review the classification system on the SGBC’s SGBP certification page.
VOCs, Indoor Air Quality, and Occupant Health
Standard finishes, adhesives, and grouts can release volatile organic compounds that degrade indoor air quality and irritate the respiratory system over time. Modern green-certified epoxy and cement grouts are formulated for very low VOC emissions, meeting strict benchmarks such as the GEV-EMICODE EC1 Plus standard for healthier interiors.
Both major suppliers offer certified options. Mapei holds numerous SGBP certifications across its range, including Ultracolor Plus and Kerapoxy. Saint-Gobain’s E.Mix tile grout conforms to Class CG2WA, is approved under the HDB Material Listing, uses recycled content, and has earned the top 4-tick “Leader” rating from SGBC.
The Bottom Line
Protecting a tiled floor in Singapore comes down to matching the material to the conditions it faces. Cement grout remains a sensible, economical choice for dry living areas, but its porous nature makes it a liability anywhere water is involved, where it invites mould, cracking, and the kind of inter-floor leakage that turns into disputes and structural damage.
In wet zones, upgrading to a two-part epoxy grout is the proactive engineering decision. Its flexural strength, water-impermeability, and chemical resistance protect the waterproofing membrane and the concrete beneath, and across any multi-year horizon it costs less than the cement it replaces. Choose by room, respect the HDB and BCA rules, and weigh the full lifecycle rather than the installation invoice.
If you have already spotted cracked joints, damp skirting, or shower-area mould, or you simply want the job done to SS 665 and SS 637 standards the first time, a professional assessment is the smart next step.
About Leong Yik Engineering & Contractor
Leong Yik Engineering & Contractor Pte. Ltd. is an HDB-licensed and BCA-registered renovation contractor in Singapore, accredited to BizSafe Star, ISO 9001, and ISO 45001 standards. The team handles floor tiling, cement screed, waterproofing, and the full scope of residential and commercial renovation, with compliance and workmanship quality at the centre of every project. To discuss epoxy regrouting, a wet-area waterproofing check, or a leak diagnosis, contact the Leong Yik team for a free consultation.
- Address: 18 Mandai Estate, #03-08 Multi-Wide Industrial Building, Singapore 729910
- Phone: +65 6693 2359
- WhatsApp: +65 9448 3512
- Email: enquiry@leongyik.com.sg
Frequently Asked Questions
Is epoxy grout allowed in HDB bathroom renovations?
Yes. Epoxy grout is fully permitted on HDB bathroom floors and walls and is widely recommended to prevent seepage, cracking, and mould. The one caveat: if your flat is a BTO within its first 3 years, you cannot hack the original floor. You would use the overlay method to lay new tiles over the existing ones, then apply epoxy grout to the new joints.
Why does cement grout crack and discolour so quickly in Singapore bathrooms?
Two reasons. It is rigid, so the daily micro-movements of a high-rise building cause hairline cracks. And it is porous, so soap scum, shampoo, and body oils soak into the joints during showers, feeding black mould and creating discolouration that will not scrub out.
How long does epoxy grout last compared with cement grout in wet areas?
In a typical Singapore bathroom, cement grout usually starts degrading, cracking, or moulding within 2 to 5 years even when sealed. Correctly installed epoxy grout commonly lasts 10 to 20 years or more and often outlives the tiles themselves.
How much does epoxy grout cost per square foot in Singapore?
Roughly S$7.00 to S$15.00 per square foot, against S$2.50 to S$4.00 for cement. A single bathroom regrouting job typically carries a minimum mobilisation charge from around S$500.
Can I install epoxy grout myself as a DIY project?
You can, but it is discouraged for beginners. Epoxy has a 30 to 45 minute pot life, needs precise mixing, and leaves a hard-to-remove haze if cleanup is slow. A mistake is often permanent, so professional installation is the safer choice.
What is the difference between epoxy grout and marble gum?
Epoxy grout is a two-part resin filler that is fully waterproof and suited to wet bathrooms, kitchens, and most tile types. Marble gum is a polyester compound used only on unglazed homogeneous or marble tiles in dry areas; it is polished flush for a seamless look but turns slippery when wet and needs repolishing every few years, so it is not for wet zones.
Is epoxy grout completely waterproof?
For practical purposes, yes. Its non-porous structure gives near-zero capillary absorption, so it functions as a genuine waterproof barrier without any sealer.
Do I still need waterproofing if I use epoxy grout?
Yes. Grout sits above a separate waterproofing membrane required under SS 637:2018. Epoxy grout strengthens the system by keeping the screed dry, but it does not replace the membrane.
Why is my bedroom floor damp when the leak is in the bathroom?
That is lateral seepage. Water trapped in a porous bathroom screed travels horizontally and exits at the skirting of adjacent rooms, damaging parquet and built-in wardrobes even when the ceiling below stays dry.
What happens if my neighbour's leak damages my ceiling?
The floor slab is jointly owned, so repair costs are shared. Under HDB’s Goodwill Repair Assistance scheme, HDB covers 50 percent of the slab repair when both parties cooperate, and the owners split the rest at 25 percent each. Personal fixtures such as cabinets and false ceilings are not covered and must be settled between neighbours.
Does epoxy grout need sealing or annual maintenance?
No. Unlike cement grout, which needs resealing every 6 to 12 months, epoxy is sealer-free for its lifespan and cleans with a damp cloth.
Which grout is best for an HDB BTO bathroom specifically?
Epoxy, applied to new tiles laid by the overlay method if you are within the 3-year hacking restriction. It gives you a waterproof, low-maintenance finish without disturbing the protected original waterproofing membrane.