
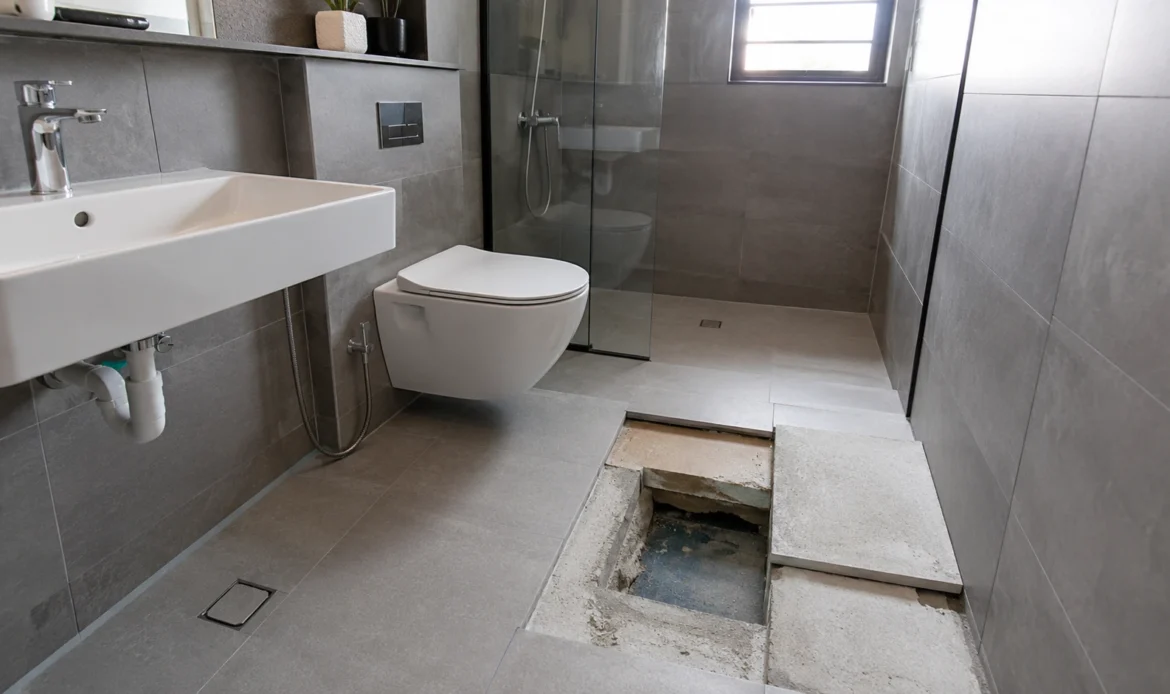
A fresh tile colour feels like a purely cosmetic choice. In an HDB flat, it rarely is. Underneath those bathroom tiles sits a waterproofing system, and in high-rise public housing your bathroom floor is, in a very real sense, your neighbour’s ceiling. Get the tiling right and nobody downstairs ever thinks about it. Get it wrong and you are looking at a fine, a voided warranty, a leak through someone else’s living room, and a dispute that can drag on for months.
That is why the guidelines for wet area floor tiling deserve a proper read before you brief a contractor, not after the hacking has started. Most homeowners walk into a renovation quote knowing exactly how they want the bathroom to look, yet not which rules govern getting there. This guide closes that gap. It draws on official HDB renovation guidelines, BCA waterproofing standards, and PUB licensing rules rather than contractor folklore, and it walks you through when you are allowed to hack, what needs a permit, the thickness and waterproofing requirements, who can legally do the work, and exactly what it costs to get it wrong.
1. What counts as a "wet area" in an HDB flat?
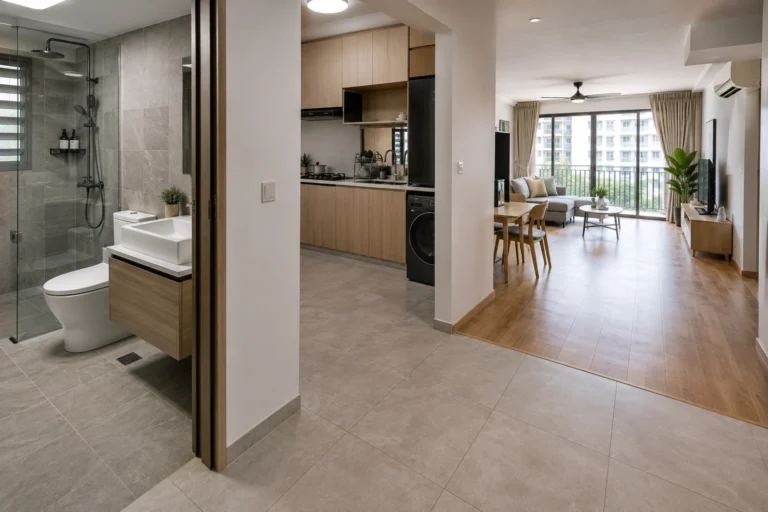
Before any rule makes sense, you need to know which floors it applies to. HDB treats some spaces very differently from others, and tiling a bathroom sits under far stricter rules than tiling a bedroom.
A wet area is a space designed to get wet and to channel that water into a floor trap: your bathrooms, toilets, and the open balcony. The kitchen sits in a closely related category because of its sink and floor traps. Everywhere else, such as the living room, bedrooms, and study, counts as a dry area, where the rules are much lighter.
The reason for the divide is not the tile. It is the waterproofing membrane laid underneath it. Think of that membrane as a continuous, flexible skin across the floor. It catches any moisture seeping through the grout and stops it before it reaches the structural concrete slab. In a landed home, a failed membrane is your problem alone. In a stacked HDB block, where around eight in ten Singapore residents live, it quickly becomes several households’ problem, which is precisely why these floors are regulated so carefully.
Wet areas vs dry areas
Knowing the category tells you which rules apply:
- Wet areas: bathrooms, toilets, and the open balcony. Strict waterproofing, thickness, and permit rules apply.
- Dry areas: living room, bedrooms, study, and corridor. Lighter rules, and overlay is often permitted without a permit.
- The kitchen’s hybrid status: it has water and floor traps, so waterproofing matters, but it is not subject to the same 3-year tile restriction as bathrooms and toilets.
Quick definition: if a space has a floor trap and is meant to handle standing or splashing water, treat it as a wet area and assume the stricter guidelines apply.
Why your floor is your neighbour's ceiling
Picture the path water takes when a membrane fails. It moves through the grout, into the screed, down to the slab, and through the slab into the unit below. There is no second barrier waiting to catch it. That single vertical path is the whole reason HDB protects the membrane so fiercely. A compromised wet-area floor does not stay contained to your flat. It surfaces as a brown patch on a neighbour’s ceiling, and the resulting seepage investigation, repair, and arguments over who pays can sour a relationship you will live beside for years. Wet-area tiling, then, is a shared-safety decision dressed up as a décor one.
2. The 3-year rule: the restriction that governs everything
If you have just collected the keys to a new Build-To-Order (BTO) flat, one rule overrides everything else in this article, and it decides whether your bathroom plans are a “do it now” or a “wait.”
For the first three years, you are not allowed to remove or hack the wall and floor tiles in your bathrooms and toilets. This is stated directly in HDB’s renovation guidelines for building works, and the logic is engineering, not bureaucracy. HDB lays a tested waterproofing membrane beneath the original tiles, and that system is covered by a warranty against leaks. The membrane needs time to settle and prove itself through normal daily use. Hack the tiles out early and you almost certainly damage the membrane before it has been validated, and you void the warranty the instant you do.
Warning: hacking a BTO bathroom inside the 3-year window voids HDB’s original waterproofing warranty immediately. Any leak afterwards becomes your financial responsibility, including repairs to the unit below.
What you can still do within those three years is more than enough for a dramatic refresh:
- Overlay new tiles over the existing ones, within the permitted thickness limit.
- Repaint and re-grout.
- Change fittings, accessories, mixers, and light fixtures.
- Replace the water closet, basin, and shower screen, as long as the floor slab and waterproofing stay untouched.
How the 3-year period is calculated (TOP vs key collection)
This is where people miscount. The clock does not start on the day you collected your keys. It starts from the date the Temporary Occupation Permit (TOP) was issued for your block, and the two dates can differ by weeks or even months. Always check your block’s TOP date, which your contractor or HDB can confirm, before assuming you are clear to hack.
What you can and can't do within the first three years
A simple split keeps you on the right side of the line:
Allowed within 3 years | Not allowed within 3 years |
Overlay tiles within the thickness limit | Hacking floor or wall tiles |
Repaint and re-grout | Removing the screed |
Swap fittings, mixers, accessories | Disturbing the waterproofing membrane |
Replace WC, basin, shower screen (slab untouched) | Raising the floor by re-tiling onto the slab |
The takeaway is simple: you can transform how the bathroom looks without touching what protects it. Save the full hack-and-redo for after the restriction lifts.
How the rule changes for resale flats
If you have bought a resale flat that is already more than three years past its TOP date, the restriction simply does not apply to you. You may hack, re-waterproof, and re-tile, provided you obtain the correct permit and use a registered contractor. Resale owners have more freedom, but the permit and waterproofing requirements covered below still apply in full.
3. Overlay vs hacking: know which one you're doing
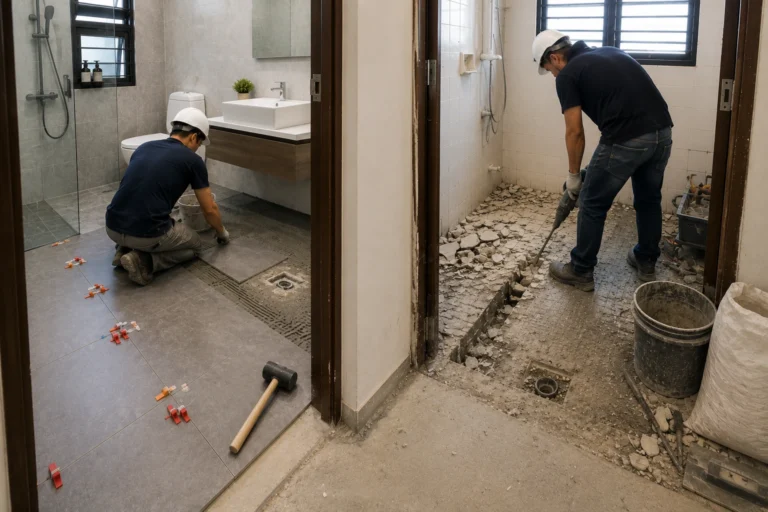
This is the single most misunderstood distinction in HDB tiling, and almost every downstream decision (permit, cost, waterproofing, timeline) hangs on it.
What "overlaying" means
Overlaying means laying a new finish directly on top of the existing one without removing it. It is the faster, cheaper, less disruptive route, with no demolition dust and no exposed slab. The trade-off is height. Every overlay raises the floor level, and in a wet area that has consequences for drainage and door clearance.
What "hacking" means
Hacking means chiselling out the old tiles and screed all the way down to the slab before re-laying. It is the right call when the existing finish is failing, uneven, or, in an older resale flat, sitting on a membrane that is near the end of its life. Because hacking exposes the slab, a new waterproofing system becomes mandatory before anything is re-tiled. If your project calls for this, a licensed HDB-approved hacking and demolition specialist will also manage debris removal and disposal in line with the rules.
Here is how the two methods compare:
Overlay | Hacking | |
Existing floor removed? | No | Yes, down to screed or slab |
BTO within 3 years (wet area) | Limited or conditional | Prohibited |
Permit (dry area) | Often not required | Required |
Permit (wet area) | Conditional, assess first | Required |
Disturbs waterproofing? | Should not | Yes, must re-waterproof |
Raises floor level | Yes (watch the trap and doors) | Minimal |
Why wet-area overlay is treated cautiously
Here is the catch most homeowners miss. Adding a layer in a bathroom raises the floor relative to the floor trap. That can slow drainage and, in the worst case, push water sideways into the adjoining room instead of down the trap. For that reason, HDB treats wet-area overlay far more cautiously than the dry-area overlay you would do in a bedroom, and it is not automatically permitted. Always get a written assessment from your registered contractor before overlaying a bathroom floor.
Pro tip: a wet-area overlay can lift the floor by roughly 5 to 6 mm, and suddenly the toilet door scrapes or will not close. Before any tile goes down, measure the gap under every door in the renovation scope, and put door-trimming in the contract if the clearance is tight.
4. When you need an HDB renovation permit for wet-area tiling
A permit is HDB’s written approval, obtained before work begins. It cannot be granted retroactively, it is not transferable between contractors, and your registered contractor submits it on your behalf. Knowing the triggers before you ask for quotes saves you from a stop-work order later.
Works that always require a permit
In wet-area tiling, you will generally need a permit when the job involves any of the following:
- Removing and replacing floor finishes with any material, including tiles, marble, porcelain, vinyl, or timber laminate.
- Hacking existing wall or floor finishes in a bathroom or toilet, after the 3-year restriction has lifted.
- Raising the floor level in a bathroom, toilet, kitchen, or balcony.
- Installing finishes that exceed 50 mm in total thickness.
The rule of thumb: if tiles or screed are coming off, assume you need a permit. You do not apply yourself; your contractor handles the submission through HDB’s renovation permit application process, though you remain ultimately responsible for ensuring the work is compliant.
Works that are permit-free but still bound by the guidelines
Some jobs do not need a permit but are still governed by the rules, because permit-free is not rule-free. Examples include laying new tiles over a single existing layer within the 13 mm limit, or swapping sanitary fittings without disturbing the floor. You still have to respect thickness limits, waterproofing standards, and noise hours.
Permit timeline and completion deadlines
Two timing facts belong in your schedule:
- Processing typically takes a few weeks, so do not promise yourself a start date until approval is confirmed.
- Completion windows are time-bound from the permit date: roughly three months for BTO flats and one month for resale flats.
Warning: never let work begin before the permit is in hand. Starting early can lead to fines and a reinstatement order, and the permit cannot be backdated to cover it.
5. The thickness rules: 13 mm and 50 mm explained
Two numbers dominate HDB tiling conversations, and they are constantly confused with each other. They govern different situations, and understanding both keeps your floor compliant and your slab safe.
The 13 mm overlay limit
If you lay new tiles over existing floor finishes using adhesive, only one layer of existing finish may be present, and the total thickness of the new tiles plus adhesive must not exceed 13 mm. The work must not tamper with the floor trap or cause backflow or lateral seepage into adjacent rooms. This is the limit that makes an overlay viable inside the 3-year window.
The 50 mm finish-and-screed limit
When you re-do a floor properly, the combined thickness of the floor finishes plus screed must not exceed 50 mm. This is the bigger structural guardrail. An HDB floor slab is engineered to carry a specific dead load, and piling on excessive screed and tile eats into that safety margin. Heavier is emphatically not better, and the 50 mm ceiling keeps floor levels sensible across the whole flat too.
The pre-packed screed mandate
There is a materials rule on top of the thickness rules. Since 1 June 2015, HDB has required pre-packed screed even for dry-area floors, to keep screed quality consistent rather than mixed on site to variable standards. For wet areas, the requirement steps up: pre-packed waterproofing screed plus an approved membrane must go in before any new finish is laid.
Key takeaway: 13 mm governs overlays over one existing layer; 50 mm governs the total build-up when you re-tile. Both exist to protect the slab. Keep them straight and you will read any quote correctly.
6. Waterproofing: the layer you can't see but can't skip
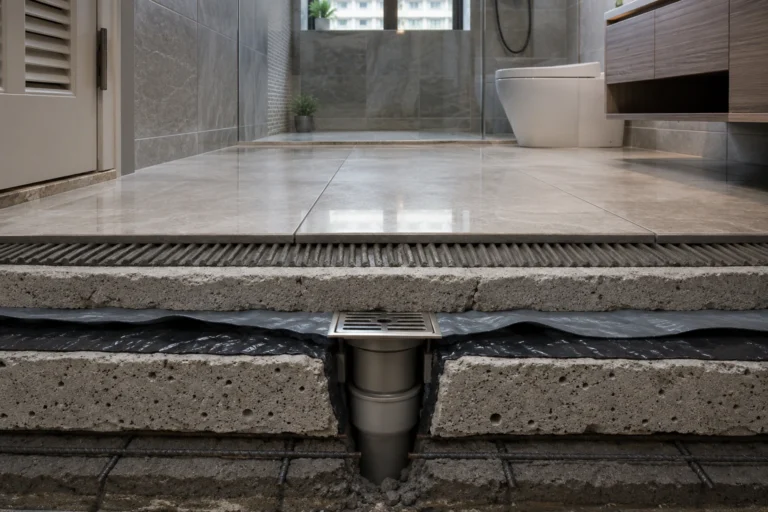
This is the highest-value, most under-explained part of any wet-area job. Whenever a wet-area floor is hacked and re-laid, a fresh waterproofing system must be installed to a proper specification, and as the homeowner you should be able to read that spec on a quote and judge whether it holds up.
Pre-packed waterproofing screed and membrane
The non-negotiable foundation is pre-packed waterproofing screed and an approved membrane, applied before the new finishes. Both are mandatory before tiling a wet floor. A quote that lists “tiling” without naming the waterproofing system is incomplete.
The 150 mm upturn (and higher at showers)
Waterproofing a floor and stopping at the floor line is a classic, expensive mistake. Splash and capillary action move water up the wall behind the tiles, so the membrane has to climb with it. HDB and BCA practice calls for the membrane to be upturned at least 150 mm up the walls, kerbs, and around pipe penetrations, and ideally higher, around 300 mm, on walls that take direct shower splash. That vertical upturn is what keeps the wall behind your tiles from slowly saturating.
Membrane thickness by system type
Thickness depends on the system, and a credible contractor will name both. As a guide aligned with BCA’s Good Industry Practices for waterproofing internal wet areas:
Membrane system | Typical dry-film thickness |
Cementitious | about 2 to 3 mm |
Polyurethane (PU) | about 1 to 1.5 mm |
Acrylic with fibreglass reinforcement | about 1.2 mm minimum |
The governing national standard is SS 637:2018, the Code of Practice for Waterproofing of Reinforced Concrete Buildings, which superseded the older CP 82.
Pro tip: if a quotation just says “single-coat liquid waterproofing” with no system type and no thickness, that scope is unverifiable. Ask your contractor to specify the system, the dry-film thickness, and the upturn height in writing. A firm that also offers dedicated roof and wet-area waterproofing services will usually have no trouble putting these details on paper.
7. The ponding (flood) test
Once the waterproofing and tiling are done, there is one final proof-of-quality step you should never let a contractor skip: the water ponding test, often called a flood test.
The finished wet-area floor is sealed and flooded, commonly to around 25 mm of water for roughly four hours, while the unit below is checked for any sign of seepage. (These parameters reflect common industry practice aligned with BCA guidance rather than a single published HDB figure, but they are the benchmark most contractors work to.) Passing this test is your documented evidence that the membrane is sound before the fittings go back in.
Warning: no test, no sign-off. A ponding test costs a few hours of waiting. Rectifying a leak discovered after the bathroom is fully fitted out costs far more, and may mean tearing out finishes you just paid for. Insist on the test and ask to see the result.
8. Who is legally allowed to do the work
You cannot legally hand HDB wet-area tiling to just any handyman. The credential map is specific, and verifying it protects both your home and your wallet.
Directory of Renovation Contractors (DRC)
The contractor must be listed on HDB’s Directory of Renovation Contractors (DRC). This applies to all works in your flat, whether or not a permit is required. DRC firms meet minimum experience requirements and have completed HDB’s renovation training. Engaging one is also a layer of consumer protection: contractors who repeatedly breach the rules accumulate demerit points and can be removed from the directory altogether. You can confirm a firm’s status through HDB’s list of registered renovation contractors before you sign anything.
Specialist licences (PUB plumber, BCA window, LEW)
Different trades within the job require different licensed professionals:
- Water and sanitary works, including relocating a floor trap, toilet bowl, or basin, must be carried out by a PUB-licensed plumber. Since 1 April 2018 it has been an offence to engage an unlicensed plumber for regulated works, as set out in PUB’s requirements for plumbing works.
- Window works require a BCA-approved window contractor.
- Electrical works require a Licensed Electrical Worker (LEW).
Key takeaway: no DRC listing, no HDB job. And for anything touching your pipes, a PUB-licensed plumber is not optional; it is the law.
9. Choosing the right tiles for a wet area
Compliance gets you a legal floor. The right tile gets you a floor that is safe and lasts. Wet-area floors are wet by design, so the material you pick matters as much as how it is installed.
Slip resistance and safety first
For a bathroom or toilet floor, prioritise a non-slip porcelain or ceramic with a slip-resistance rating of R10 or higher. A glossy, low-friction tile can look stunning when dry and become a genuine hazard the moment it is wet, which is a real concern in homes with young children or elderly family members. Choose the slip rating before you fall in love with the colour.
Format, grout lines, and fall
A few practical choices make a wet floor drier and easier to live with:
- Large-format tiles, such as 300 by 600 mm or 600 by 600 mm, mean fewer grout joints. Grout is the most water-permeable part of any tiled floor, so fewer lines means fewer potential entry points, and a compact HDB bathroom feels more open.
- Porcelain over natural stone in the shower zone. Porcelain is dense and low-porosity, while many natural stones need ongoing sealing to survive constant moisture.
- Mind the fall. However beautiful the tile, the floor must be laid with a gentle slope toward the floor trap. A tile laid to a flat fall will leave puddles no matter how good it looks.
- Wet zone vs dry zone. Many HDB toilets now split a tiled wet zone around the shower from a drier zone near the basin. Keep the slip-rated tiles and proper slope in the wet zone, and use the dry zone for warmer or more decorative finishes.
A word of local context: with the vast majority of residents living in HDB flats, and Singapore’s high-density, high-humidity climate keeping wet-area waterproofing under near-constant load, these guidelines run stricter than what you would meet for a landed or overseas property. They are written for stacked living, where one careless floor affects several homes.
10. Renovation hours and noise rules in 2026
Tiling is noisy work. Hacking, tile-cutting, and heavy drilling all fall into HDB’s stricter “noisy works” category, and scheduling them correctly keeps you compliant and keeps the peace with neighbours.
General vs noisy works hours
- General renovation works: 9:00 am to 6:00 pm on weekdays and Saturdays.
- Noisy works (hacking, tile cutting, heavy drilling): 9:00 am to 5:00 pm on weekdays only, and not on Saturdays, Sundays, public holidays, or the eve of major public holidays.
- No renovation at all on Sundays or public holidays.
The headline for tilers: your noisy work stops at 5:00 pm, and it does not happen on weekends.
The new 1 pm to 2 pm quiet hour and prohibited days
The notable 2026 change is a daily quiet hour from 1:00 pm to 2:00 pm, which no loud renovation may cross. In practice it splits a noisy-work day into two blocks, roughly 9:00 am to 1:00 pm and 2:00 pm to 5:00 pm. Your contractor must also post a Notice of Renovation and inform immediate neighbours before works begin. Because these rules are revised from time to time, it is worth confirming the current timings before you lock your schedule.
Mon to Fri | Saturday | Sun and Public Holidays | |
General works | 9 am to 6 pm | 9 am to 6 pm | Not allowed |
Noisy works | 9 am to 5 pm (no 1 to 2 pm) | Not allowed | Not allowed |
11. The real cost of getting it wrong
It is tempting to treat the guidelines as red tape. The penalties say otherwise, and they stack up quickly:
- Fines of up to S$5,000 for breaching renovation guidelines, plus a possible reinstatement order requiring you to restore the original condition at your own expense.
- A voided waterproofing warranty. Hack a BTO bathroom inside the 3-year window and HDB’s original warranty falls away immediately. From that point, any leak, to your own floor or the unit below, is your financial liability. Once you add repairs to a neighbour’s ceiling, rectification can run into the low thousands of dollars (an indicative figure, not a fixed cost).
- Contractor demerit points and damaged relations with the neighbours you share a wall and a floor with.
Key takeaway: cutting corners is not the cheap option. It is the expensive one with a delay attached. Doing the job to spec, with a permit and a ponding test, is almost always the lower-cost path once you account for the risk.
12. Your pre-hacking compliance checklist
Here is the whole article distilled into a sequence you can run before a single tile is lifted in a wet area:
- Confirm your TOP date. If you are a BTO owner under three years, hacking is off the table, so plan an overlay instead.
- Engage a DRC-listed contractor, and confirm a PUB-licensed plumber for any sanitary work.
- Get the permit submitted and approved before work starts.
- Lock the specification in writing: waterproofing system, membrane dry-film thickness, 150 mm upturn, and total floor build-up within 50 mm (or 13 mm for an overlay).
- Check door clearances so an overlay does not trap your doors.
- Schedule noisy works inside the 9:00 am to 5:00 pm weekday window, respecting the 1:00 pm to 2:00 pm quiet hour.
- Insist on a ponding test before any fittings are reinstalled.
Tick all seven, and your wet-area floor tiling will be compliant, durable, and dispute-free.
Frequently asked questions
What counts as a wet area in an HDB flat?
Wet areas are spaces designed to handle water and drain it through a floor trap, namely your bathrooms, toilets, and open balcony. The kitchen is treated similarly because of its sink and floor traps. Everywhere else, such as the living room and bedrooms, is a dry area with much lighter rules.
Can I retile my BTO bathroom floor in the first year?
You cannot hack and replace the tiles. The 3-year restriction protects the original waterproofing membrane and is measured from your block’s TOP date. You can, however, overlay new tiles within the thickness limit, repaint, and change fittings.
Does the 3-year rule apply to resale flats?
No. If your flat is more than three years past its TOP date, you may hack, re-waterproof, and re-tile, subject to obtaining the correct HDB permit and using a registered contractor.
What's the difference between overlaying and hacking my floor?
Overlaying lays a new finish on top of the existing one without removing it. Hacking strips the floor down to the screed or slab before re-laying. Hacking always triggers fresh waterproofing, and in wet areas after the 3-year period, a permit.
Can I overlay new tiles over my bathroom floor without hacking?
Sometimes, but cautiously. Wet-area overlay raises the floor relative to the floor trap, which can affect drainage and cause lateral seepage, so HDB does not treat it as automatically permitted. Get a written assessment from your registered contractor first.
What's the difference between the 13 mm and 50 mm thickness limits?
13 mm is the maximum thickness for new overlay tiles plus adhesive laid over a single existing layer. 50 mm is the maximum combined thickness of floor finishes plus screed when you re-do a floor. They apply to different situations, and both protect the structural slab.
Why does HDB require pre-packed waterproofing screed?
Pre-packed screed delivers consistent, factory-controlled quality rather than variable on-site mixes. In wet areas, pre-packed waterproofing screed plus an approved membrane is mandatory before new finishes, to ensure a reliable barrier against seepage.
How high should the waterproofing membrane go up the wall?
At least 150 mm up the walls, kerbs, and around pipe penetrations, and ideally around 300 mm on walls hit by direct shower splash. This upturn stops water from creeping up the wall behind the tiles.
Can my regular handyman or a non-DRC contractor do the tiling?
No. Wet-area tiling in an HDB flat must be done by a contractor listed in HDB’s Directory of Renovation Contractors, with a PUB-licensed plumber for any regulated water and sanitary works.
What happens if I hack my BTO bathroom tiles before three years?
You void HDB’s waterproofing warranty immediately and risk a fine of up to S$5,000 plus a reinstatement order. Any future leak to your floor or the unit below becomes your financial responsibility, making it one of the most expensive shortcuts in any renovation.
Conclusion
Wet-area floor tiling rewards the homeowner who treats it as a structural and neighbourly decision rather than a styling one. The membrane under your tiles does quiet, important work for the whole block, and the guidelines exist to keep it intact. Master a handful of fundamentals and the rest falls into place: know your TOP date, choose overlay or hacking deliberately, secure the permit before anyone lifts a chisel, demand a waterproofing spec you can actually read, and verify your contractor’s DRC listing and your plumber’s PUB licence.
The most practical next step is to confirm your eligibility against your block’s TOP date, then brief a registered contractor with the specification in writing, including the waterproofing system, the upturn height, and a ponding test before sign-off. When in doubt, check the current requirements directly with HDB, since these rules are updated periodically.
If you would rather have an HDB-approved team handle the permit paperwork, hacking, waterproofing, and tiling as one coordinated job, Leong Yik Engineering & Contractor is a BCA-registered, BizSafe Star, HDB-licensed renovation contractor based at 18 Mandai Estate #03-08, Multi-Wide Industrial Building, Singapore 729910. You can request a free consultation on 65 6693 2359 or through the Leong Yik enquiry and quotation page. Do that, and the only thing your neighbours downstairs will ever notice about your new floor is that they never have to think about it.
Last reviewed: 28 June 2026. Regulatory framework: Housing & Development (Renovation Control) Rules, as amended by Regulation S 725/2025. Verify current requirements with HDB before commencing work.